|
So many of you are wondering how you can mount a DMG (disk image) clone which will allow you to use migration assistant to pull data from it. Here I'll show you the easiest and best way to do this.
Background: As of Mavericks (10.9 and the current OSs) Apple did something stupid, they removed DMG support for migration assistant. Actually they didnt remove support, they changed the way migration assistant logged out of the current user, which in turn unmounted all DMGs. Major bummer for the tech savvy people out there. So then came a way to use the sudo command in the terminal to mount the DMG as the root user, thus keeping it mounted even after the logout. BUT, if you've ever tried to mount a large DMG, the OS will run a checksum (verification) which can take FOREVER (hours even). The FIX:
Why is this awesome? Because the option "-noverify" skips the OS verification and the DMG mounts instantly. You're welcome.
0 Comments
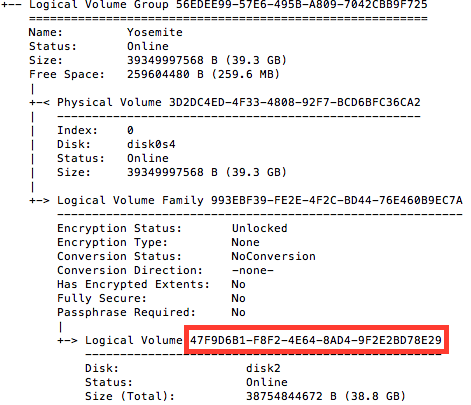
If you know what we're talking about and don't care about the why then skip down to "Fix". Since Yosemite was released (and continues in El Capitan) our repair technicians started to notice a funny problem, Mac's were showing up with a incorrect disk partition scheme: Logical Core Partition or Encrypted Logical Core. What the heck is this? These two partitions schemes do have a place in the apple universe, they are intended for iMacs that have a "fusion drive." These are custom ordered iMacs that have an SSD to give the user speed and a standard rotational HD that provides massive storage space, and apple created a special partition scheme that would marry the two together so the user would see one single drive. Nice right? Not really. When Yosemite was releases we began to see Non Fusion drive Mac change to this partition type completely at random and for completely unexplained reasons. We saw it the most in Macs with stock SSDs like the MacBook Airs and Retina Display MacBook Pros but also in HDD Macs too. Why is this a problem? When the internal HD is in the incorrect partition scheme the performance suffers considerably. We have repaired this problem on 8 of 10 macs so it's very prevalent. This requires some terminal work, but its super easy. THE FIX
The operation should only take a few moments and once finished your disk will be back to normal! Although we always recommend a backup before doing any work like this, this process wont erase anything, you can even run this directly from the system with the bug. **Thanks http://awesometoast.com/ for the image.
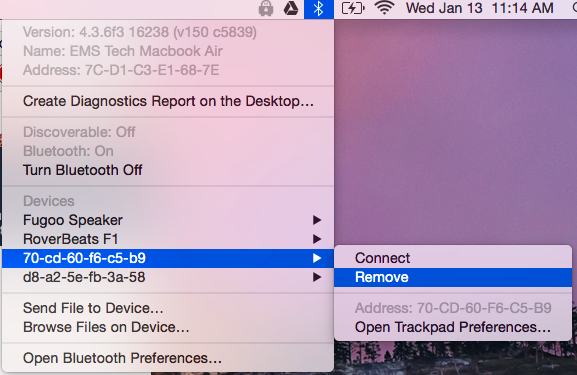
Sometimes you may encounter a situation where you have a long list of bluetooth items in your menu list, but they don't show up in the bluetooth preferences. So how do you remove them? FIX Option 1: Remove them one at a time.
Option 2: Remove ALL the bluetooth devices at once.
WARNING: THIS WILL REMOVE EVERYTHING INCLUDING ALL THE DEVICES YOU MAY WANT.
|
Need Help?Having trouble with making the directions in a post work? just click... Archives
July 2023
Categories |


 RSS Feed